Elektor Lab Notes 16: LoRaWAN-project, M5NanoC6, DC/DC-converters en meer
Bekijk de nieuwste aflevering van Elektor Lab Notes. We bespreken enkele van de nieuwste projecten in ons lab, inclusief updates over het LoRaWAN-project, het testen van DC/DC-converters en PCB-veiligheid.
Welcome back to Elektor Lab Notes! Every few weeks, our engineers and busy editors post a few lab notes and updates about new DIY electronics projects, industry news, and helpful engineering tips. In this edition of Lab Notes, we present updates about the LoRaWAN Project, a tiny board by M5Stack, a high-power DC/DC buck converter, a few notes about the upcoming editions, and more. Please share your thoughts in the Discussion section at the bottom of this page. You can post your own lab notes and let us know what you are working on at your electronics workbench!
Saad Imtiaz (Senior Engineer, Elektor)
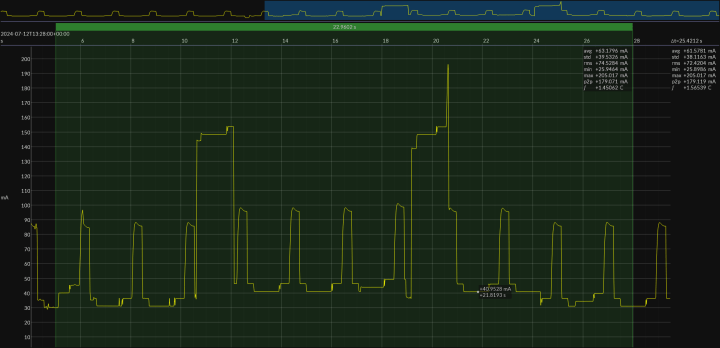
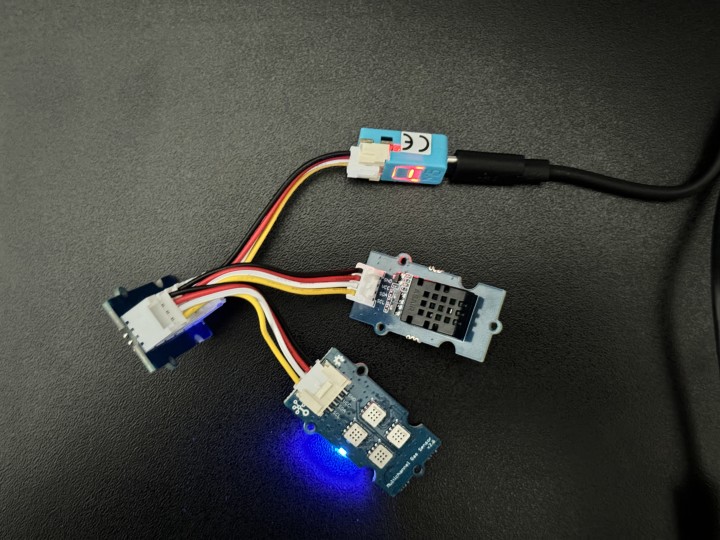
LoRaWAN Project Progress: The hardware for my LoRaWAN project is now ready, and I'm currently focused on software development and power consumption calculations. The goal is to ensure the system can run for three days without solar charging. For these power and energy consumption calculations, I'm utilizing the Joule Scope JS220. This tool has been incredibly insightful, providing all the necessary measurements and tools for precise calculations without needing anything beyond a trusty calculator. The Joule Scope's ability to measure down to 1nA has given me a detailed understanding of the power consumption of the onboard modules, making it indispensable for optimizing energy efficiency. Screenshot of the Oscilloscope mode with Joulescope, measuring the current consumption of the project while sending data via LoRaWAN E5 Module. Exploring the M5NanoC6 by M5Stack: Recently, I got my hands on the M5NanoC6, a tiny board perfect for small projects requiring only I2C connections. With its ESP32 C6 core, it supports almost all wireless protocols required for any project. I built an air quality environment sensor using the M5NanoC6, integrating the Seeed Studio MultiChannel Gas sensor and a Grove ASAIR Temperature and Humidity Sensor. I used MQTT to send the sensor data to my Home Assistant. Now, I'm planning to 3D print a nice enclosure for it, and use the onboard RGB light to notify me with color changes when it's time to open a window for some fresh air!
M5NanoC6 hooked up with a Grove I2C Hub, connected to two sensors modules.
Jean-François Simon (Engineer, Elektor)
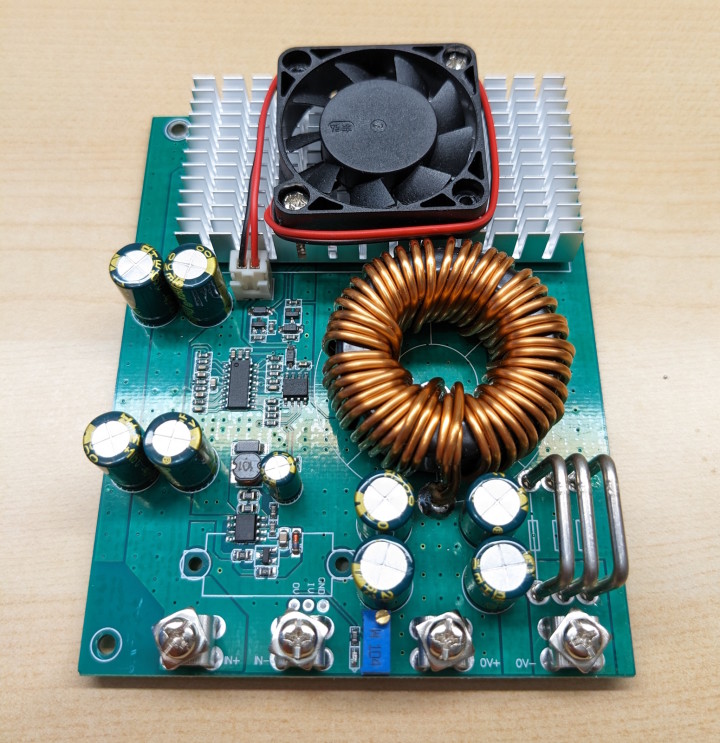
High-power buck converter: For an upcoming battery-based project, I ordered a high-power buck DC/DC converter from Aliexpress. The product page advertises a max current of 50A - impressive! And this for an input voltage range of 25 to 90 V and an output voltage between 2.5 and 50 V. Of course, Aliexpress regulars know that such figures should be taken with a grain of salt. I'll be testing the thing cautiously, using an electronic load. Too bad, I'd have liked to see which components are used in this converter, but none of the three integrated circuits have any markings! Your guess is as good as mine. As for the MOSFETs under the heatsink, they'll stay there: there's no point in removing the heatsink, glued with thermal paste/glue and screwed, for no good reason.
A hefty DC/DC converter from Aliexpress: 50 A max.
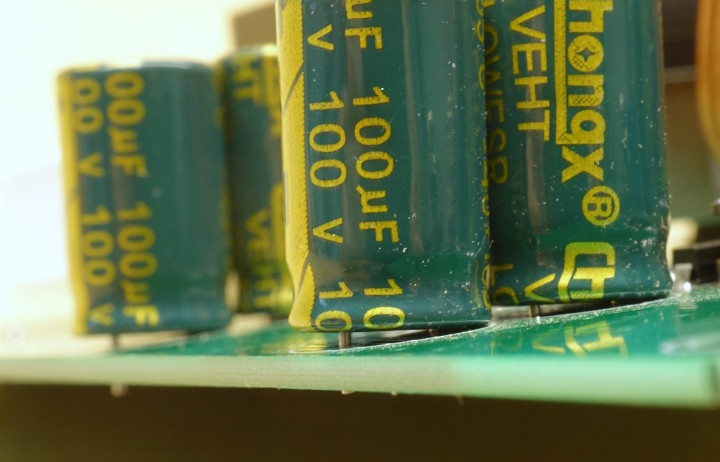
But for the moment, there's a first problem: the converter, poorly packed in the mail, has suffered an impact on its side (on the left in the photo). The input capacitors were hit and damaged:
The leads were partially ripped off by a side impact.
You'd think it was a faulty assembly, but in this particular case, it's not. Pushing on the capacitors in the opposite direction, they magically snap back into place, and the exposed part of the leads re-enter the capacitor body! Of course, this shouldn't happen. In principle, the capacitor leads are firmly crimped or welded to the internal aluminum foils, which act as electrodes. If, as in this case, the leads “slip”, this means that the capacitor's internal connections have been damaged. Given the currents involved, there's no way I'm going to risk capacitor failure later on. So I start by replacing them. Fortunately, I had spare capacitors in stock. These have a maximum voltage of 63 V, whereas the original ones were 100 V, but given that I intend to use them with a maximum input voltage of 40 V, they'll do the trick.
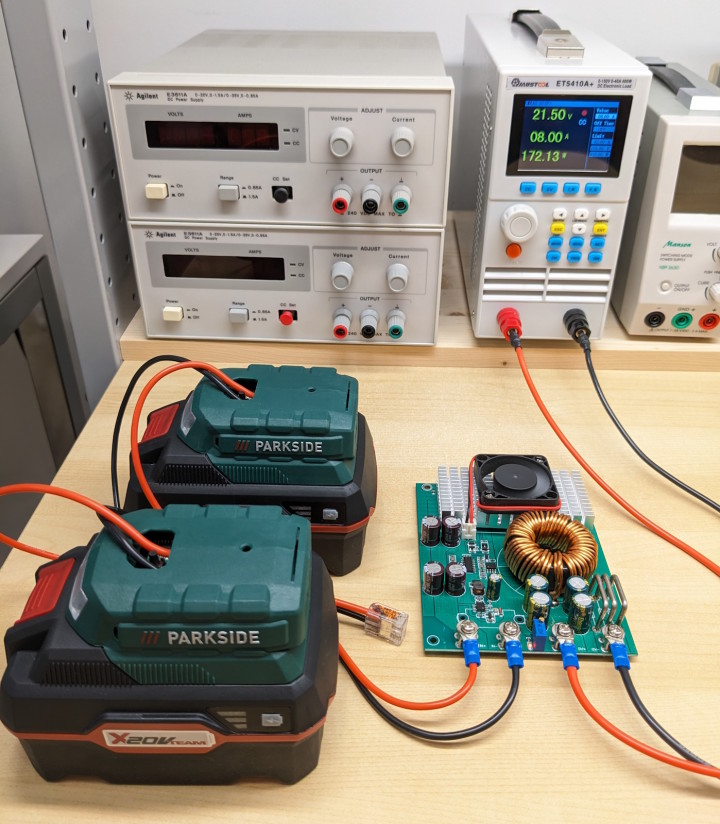
Testing the converter: Once the capacitors have been replaced and some 16 AWG and 14 AWG wires have been prepared, we can move on to testing, with two Parkside 20 V batteries in series as the voltage source: Current is gradually increased to check if the converter behaves correctly.
The application I have in mind should use around 400 W at 21.6 V, i.e. just under 20 A. So all that's left to do is test the converter to see if it can survive 20 A of output current for the required time! Without forgetting to monitor the discharge of the lithium batteries at the input, to stop the system before damaging them. Stay tuned for more!
Roberto Armani (Senior Editor, Elektor)
Safety on PCB Article:
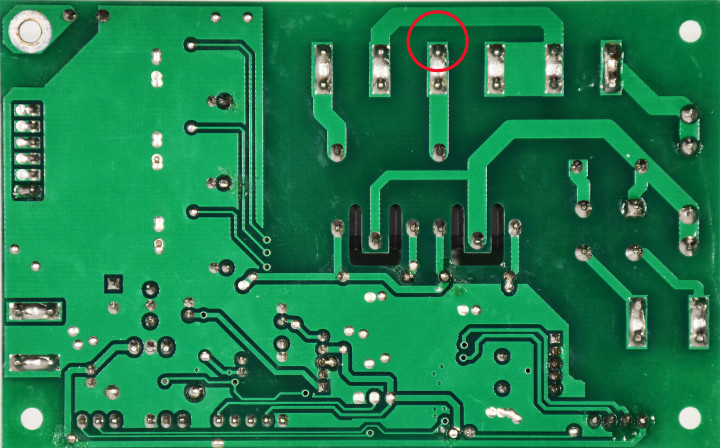
Is your PCB safe? When your design includes high-voltage sections and/or has tracks where current flow is high, safety issues may arise. In this article, to be published in the November issue of Elektor Mag, we address these two topics and suggest viable methods for achieving trouble-free operation in full compliance with safety regulations. Stay tuned to learn more! Why was a part of this PCB highlighted in red? What is the purpose of the millings in the center of the circuit?
Can this layout be considered safe, all in all?
C. J. Abate (Direct, Content and Lab, Elektor)
A few items to consider this month. Let's take a look.
Topic Pages
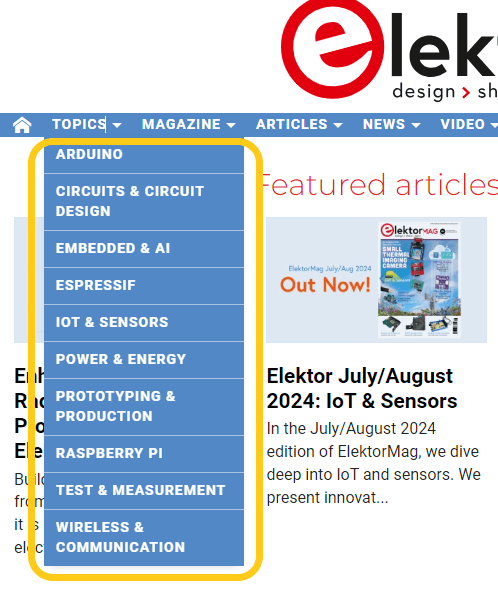
As we've explained and shown, our engineers and editors have been maintaining helpful hub pages dedicated to the topics most important to our community members. You can easily access each TOPIC page from the menu at the top of our website.
Easily navigate to the topics of your choice.
We encourage you to frequently check in your favorite topics. We update these pages regularly, with new projects, news, interviews, and tutorials.
Explore More Electronics
Want to learn more about PCB design, microcontroller projects, or electronics in general? Check out all the educational videos and tap into the knowledge of experts on our Elektor YouTube channel and our Elektor Industry YouTube channel. Subscribe to Elektor's newsletter to receive a regular flow of expert tech knowledge and interesting perspectives.


Discussie (0 opmerking(en))