Arduino Doom Game
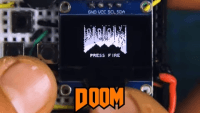
Welcoming Doom in the form of an "Arduino Doom Game"! This exceptional project brings together the beloved 90s classic video game "Doom" and the incredible capabilities of Arduino microcontrollers.
This project is also available at Max Imagination's Workshop.
In this thrilling project, we've ingeniously combined the iconic first-person shooter gameplay of Doom with Arduino's interactive and programmable features. Our aim is to create a unique gaming experience that takes the nostalgia of Doom to new heights.
How does it work? At the core of this project lies the Arduino microcontroller, a versatile and powerful device that acts as the brain of our custom-built gaming console. By integrating buttons, a battery, and a display, we've crafted a compact, handheld gaming device that allows you to play Doom on the go.
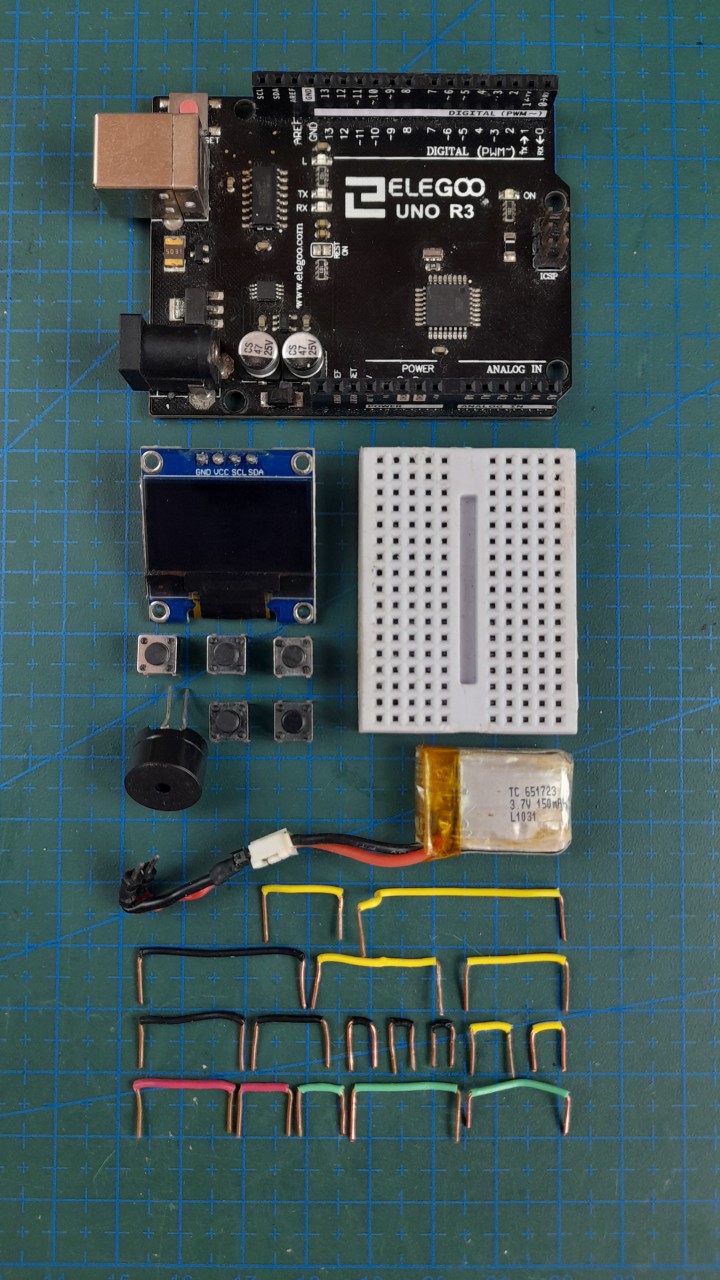
Bill of Materials
Circuit Diagram
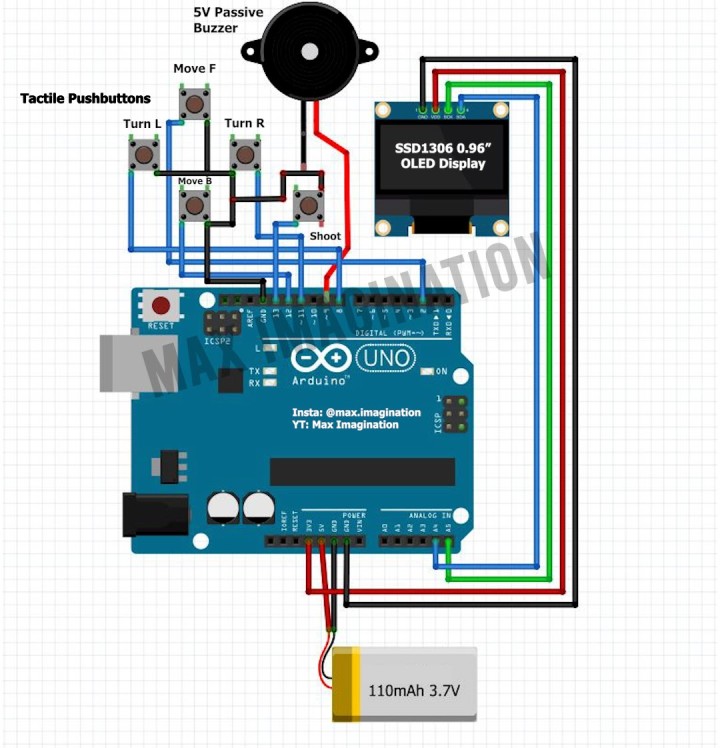
To delve into the technical aspects, provided below is a detailed diagram illustrating the hardware connections and components of the Arduino Doom Game. This diagram serves as an invaluable guide for both tech enthusiasts and curious gamers, shedding light on the inner workings of this captivating fusion.
Prepare to relive the adrenaline-pumping action of Doom as you battle demons and discover hidden secrets—all through the intuitive controls of the Arduino Doom Game. The project not only offers a nostalgic trip down memory lane but also serves as a testament to the endless possibilities of Arduino in the realm of gaming and interactive experiences.
Building the Game
Place the wires as shown in the picture below:
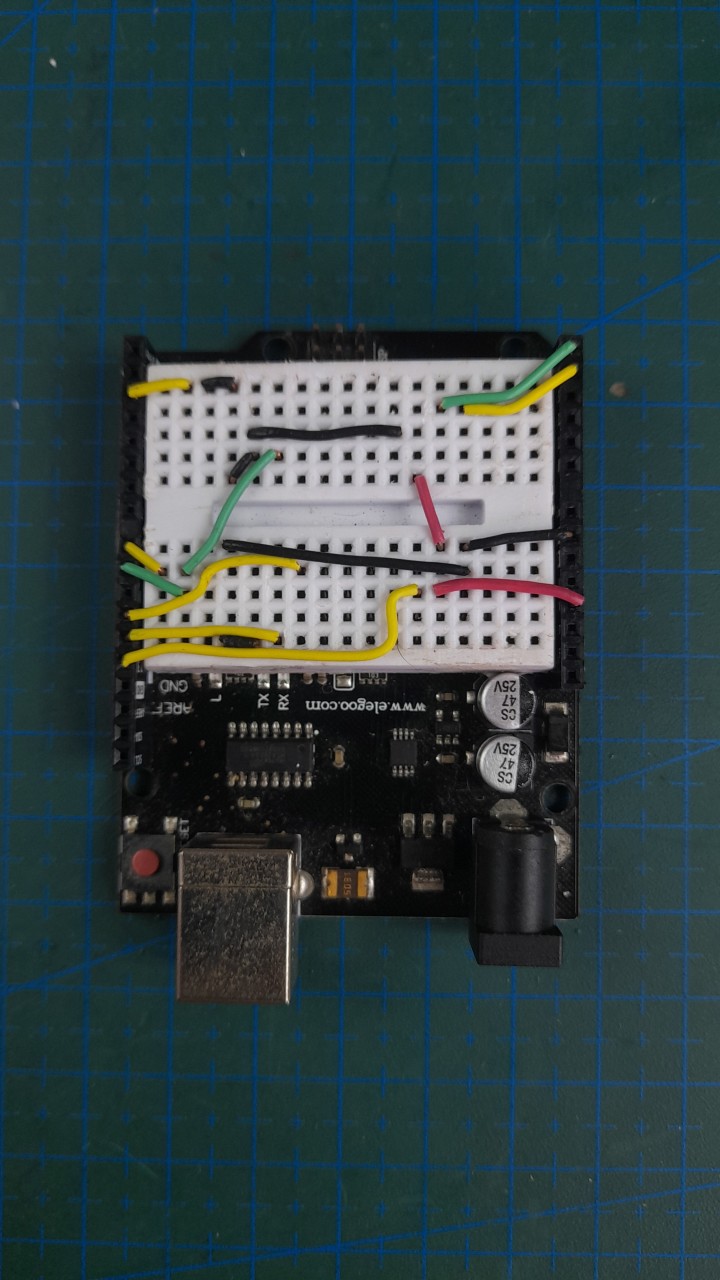
Then, add the display module, buttons, piezo buzzer and battery, as shown on the picture, while following the connections shown in the diagram. Here is the finished game:
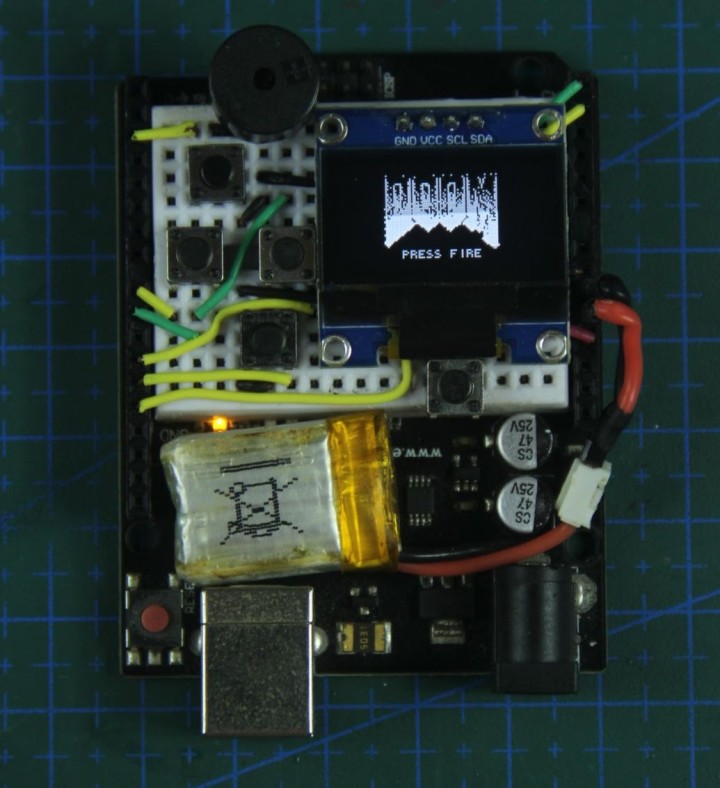
So, grab your trusty Arduino board and prepare to embark on your next project, the Arduino Doom Game! Are you up for the challenge? Click down here to check out the detailed wiring diagrams and code:
https://drive.google.com/drive/folders/1i8lTdDedyO8wFfk6w2Le6WPjFTXXiaJJ?usp=sharing
Also check out the video below:
In this thrilling project, we've ingeniously combined the iconic first-person shooter gameplay of Doom with Arduino's interactive and programmable features. Our aim is to create a unique gaming experience that takes the nostalgia of Doom to new heights.
How does it work? At the core of this project lies the Arduino microcontroller, a versatile and powerful device that acts as the brain of our custom-built gaming console. By integrating buttons, a battery, and a display, we've crafted a compact, handheld gaming device that allows you to play Doom on the go.
Bill of Materials

- (x1) MCU Board https://amzn.to/49yDaHh
- (x1) OLED Display https://amzn.to/3T1lsFk
- (x5) Push button https://amzn.to/3V2HZEn
- (x1) 5V Passive Buzzer https://amzn.to/3T19J9I
- (x1) 3.7V LiPo Battery https://amzn.to/42XEyRi
- (x1) Mini Breadboard https://amzn.to/3UWssWE
- Jumper Wires https://amzn.to/3SVoOK5
- (x1) LiPo Charging Board https://amzn.to/3v2y1bo
Circuit Diagram

To delve into the technical aspects, provided below is a detailed diagram illustrating the hardware connections and components of the Arduino Doom Game. This diagram serves as an invaluable guide for both tech enthusiasts and curious gamers, shedding light on the inner workings of this captivating fusion.
Prepare to relive the adrenaline-pumping action of Doom as you battle demons and discover hidden secrets—all through the intuitive controls of the Arduino Doom Game. The project not only offers a nostalgic trip down memory lane but also serves as a testament to the endless possibilities of Arduino in the realm of gaming and interactive experiences.
Building the Game
Place the wires as shown in the picture below:

Then, add the display module, buttons, piezo buzzer and battery, as shown on the picture, while following the connections shown in the diagram. Here is the finished game:

So, grab your trusty Arduino board and prepare to embark on your next project, the Arduino Doom Game! Are you up for the challenge? Click down here to check out the detailed wiring diagrams and code:
https://drive.google.com/drive/folders/1i8lTdDedyO8wFfk6w2Le6WPjFTXXiaJJ?usp=sharing
Also check out the video below:


Discussie (2 opmerking(en))
simone de paoli 5 dagen geleden
Drxfromlaws 1 maand geleden