
SolarBench: test your solar panel up to 300W with a MPPT matchbox
What is the power really delivered by this solar panel? is that panel working properly? are the real performance derated because of aging or counterfeit origin?This small and convinient tool can help you selecting and sorting panels by finding MPPT automaticaly. It also displays Voltage and Amps when MPPT pops out.
What is the power really delivered by this solar panel? is that panel working properly? are the real performance derated because of aging or counterfiet origin?
This small and convinient tool can help you selecting and sorting panels by finding MPPT automaticaly. It also displays Voltage and Amps when MPPT pops out.
Focus:
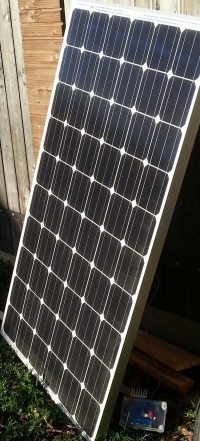
L'essor du photovoltaïque n'est plus a rappeler tant les toits des maisons les acceuillent de plus en plus. Mais il arrive parfois que le rendement ne soit plus au rendez-vous : il est fort possible alors qu'un des panneaux d'une ligne (string) soit défaillant et ruine complètement les performances du système. En effet, comme les panneaux sont montés en série, si un élément est défectueux (ou moins performant) c'est toute la chaine qui ne donne plus le meilleur d'elle même. Le marché de l'occasion et du free on board (FOB) est aussi florissant pour ceux qui veulent optimiser leur système, il leur faut alors évaluer la puissance des PV ainsi que le courant de MPPT afin d'assurer une intégration optimum puisque les informations métrologiques sont parfois erronées lorsqu'elles ne sont pas abscentes! Pour faire ces diagnostics (i.e. connaitre la puissance crête Wc, le courant et la tension de MPPT) il est nécessaire de faire une série de mesure qui peuvent être longues et fastidieuses sur site voire complètement impossible. On se propose de réaliser un appareil de poing capable de faire ces mesures automatiquement et d'afficher le résultat en clair après quelques instants .
Architecture :
To makes things clearer, please download "solarbench diagramme.jpg" below. Architecture is of course mainly based on a microcontroler from Microchip with USB capability for both bootloader (from microchip) and data transfert using a HID class. Firmware written in C18 with MPLAX IDE is performing current drain control, measurement, computation and displays results.
Pour ce faire nous allons étudier le diagramme suivant qui décrit l'architecture du montage : télécharger le fichier "solarbench diagramme.jpg" pour simplifier la lecture. L'architecture est essentiellement bâtie autour d'un micro-controleur qui pilote le drain en courant et l'affichage.
Current drain is built using a power Mosfet able to widthstand solar panel short circuit current and voltage but moreover power dissipated during the very small amount of time necessary to stabilise and measure power delivered. Dispate Mosfet keep cool during process it must operates inside its SOA (safe operating area).
The current is converted across a bank of resistor (5 0.5R in // forming one 0.1R shunt) by the ratio 1V/10A. The feedback is performed by a rail to rail AOP with a medium bandwidth to allow high speed rise time and fall time such as quite and stable running.
Le drain en courant est construit autour d'un Mosfet de puissance capable de tenir le courant de court-circuit et la tension mais surtout la puissance impulsionnelle. Une boucle de contre-réaction permet de le piloter et de recopier la tension générée par le micro aux bornes d'une résistance shunt de 0.1R de sorte que pour 1V à ses bornes on obtient un courant de 10A.
To drive the current drain, the microcontroler delivers a PWM signal to an RC circuit . The real current is read back by the firmware to avoid drifting. Voltage across solar panel is also sampled by ADC. Since V and A are known power can be evaluated at several current rampup from 1 Amp to 12 Amp with a 0.1A stepping.
La tension de référence est générée par PWM et est intégrée par un circuit RC.Le courant effectivement drainé par ce circuit est relu par une entrée ADC du micro afin de s'affranchir de toute dérive. La tension disponible aux bornes du PV est aussi échantillonnée par un autre canal de l'ADC. Ainsi il est possible d'avoir la puissance délivrée par le PV peut être évaluée pour une rampe de de courant allant de 1A à 12A par pas de 0.1A.
Firmware / operating :
Since user press "go" button, µC starts to drive current drain by ramping up the current drained from the solar panel under test. Each step is sampled by ADC channels both in current and voltage. All data are stored and power is computed, then the higher one is poped out on the display with voltage and current at this point that is the Graal : MPPT.
From this it is now very easy to sort panels or to simply disgard it if they are particulary derated.
Une fois le top départ donné, le micro commande le drain pour soutirer un courant de plus en plus important au PV, à chaque pas ce courant est mesuré mais aussi la tension disponible au bornes du PV. Le micro stocke les données ainsi acquises puis effectue le calcul de la puissance pour chaque pas effectué grâce à la célèbre formule P=U*I. Une fois fait le micro cherche la puissance maximale absorbée et l'affiche en même temps que la tension et le courant en ce point.... Il est alors facile de savoir à quel trempe de PV on a affaire : une bête de course ou bien un boiteux qu'il faut écarter sans hésiter !
Any questions?
Updates van de auteur